This article is part of our Global Sustainability Case Studies series, focusing on how Malaysia approaches post-renovation cleanup, responsible waste management, and sustainable disposal practices within the home renovation industry.
Step-by-Step: Cleaning Dust After Home Renovation
Introduction
Renovating your home is exciting—but once the contractors leave, the real challenge begins: dealing with the mountain of dust left behind. No matter how small the project, fine dust manages to settle in every corner, from your furniture to your air vents. If not cleaned properly, it can cause allergies, breathing issues, and long-term air quality problems. So, let’s go through how to clean up post-renovation dust like a pro.
Why Post-Renovation Dust Cleaning Matters
Renovation dust isn’t your regular household dust. It contains particles from cement, plaster, paint, and wood, which can harm your lungs and damage your home’s finishes. That’s why doing a detailed clean-up is crucial—not just for appearances, but for your family’s health.
Common Problems Homeowners Face After Renovation
Many homeowners underestimate how much dust renovation produces. Even with plastic covers and closed doors, fine particles sneak into bedrooms, cabinets, and electronics. The result? Weeks of sneezing, dusty surfaces, and a persistent powdery smell.
Understanding Renovation Dust
If you need a full breakdown of the entire post-renovation process in Malaysia, you can read our detailed guide here: Post-Renovation Cleanup in Malaysia.
What Causes Renovation Dust?
Cutting tiles, sanding walls, drilling holes, and breaking concrete all release micro-particles. These particles are so fine that they float for hours before settling—making them harder to clean.
Health Risks of Inhaling Fine Dust Particles
Breathing in cement or silica dust can cause coughing, sore throats, and even long-term lung damage. Kids and elderly family members are especially at risk, so proper cleanup isn’t optional—it’s necessary.
How Dust Spreads to Every Corner of Your Home
Dust travels through air vents, gaps under doors, and even clothing fibers. That’s why even rooms that weren’t renovated often end up covered in a fine layer of dust.
Preparation Before Cleaning
Essential Cleaning Tools and Equipment
You’ll need: a HEPA vacuum, microfiber cloths, mops, buckets, gentle detergents, air purifiers, and disposable gloves.
Protective Gear You Should Wear
Always wear a dust mask, goggles, and gloves to avoid irritation or breathing in harmful particles.
Safety Precautions Before You Start
Turn off air conditioning to prevent dust from spreading. Open windows for ventilation. Make sure the floor is dry to avoid slipping.
Step 1: Remove All Debris and Large Particles
Start by picking up and disposing of large pieces like wood, tiles, or plaster.
How to Collect Construction Waste Safely
Use heavy-duty garbage bags and avoid overfilling them. Sharp edges can tear the bag and scatter debris again.
Why You Shouldn’t Use a Regular Trash Bin
Construction waste often exceeds regular bin limits. Using them may lead to penalties from local councils.
Renting a RORO Bin for Renovation Cleanup
A RORO (Roll-On Roll-Off) bin makes cleanup easier. You can load all large debris and get it hauled away safely—perfect for Malaysian homeowners doing major renos.
Step 2: Vacuum Every Surface Thoroughly

Choosing the Right Vacuum Cleaner for Fine Dust
A HEPA vacuum is essential—it traps microscopic particles that regular vacuums blow back into the air.
The Proper Technique to Vacuum Floors, Walls, and Ceilings
Move slowly and overlap each pass. Start from the top (ceilings) and work your way down.
Tips for Vacuuming Upholstery and Furniture
Use a soft brush attachment for couches and curtains to prevent scratches.
Caption: A homeowner thoroughly vacuuming fine dust after renovation to restore a clean and healthy indoor space.
Step 3: Wipe Down Walls and Surfaces
How to Safely Clean Painted or Wallpapered Walls
Use a lightly damp microfiber cloth—avoid soaking walls, especially if they’re freshly painted.
Using Damp Cloths and Microfiber Towels Effectively
Microfiber traps dust better than regular rags. Rinse frequently to prevent smearing.
Hidden Spots You Might Forget
Light switches, door frames, and the top of picture frames are often missed.
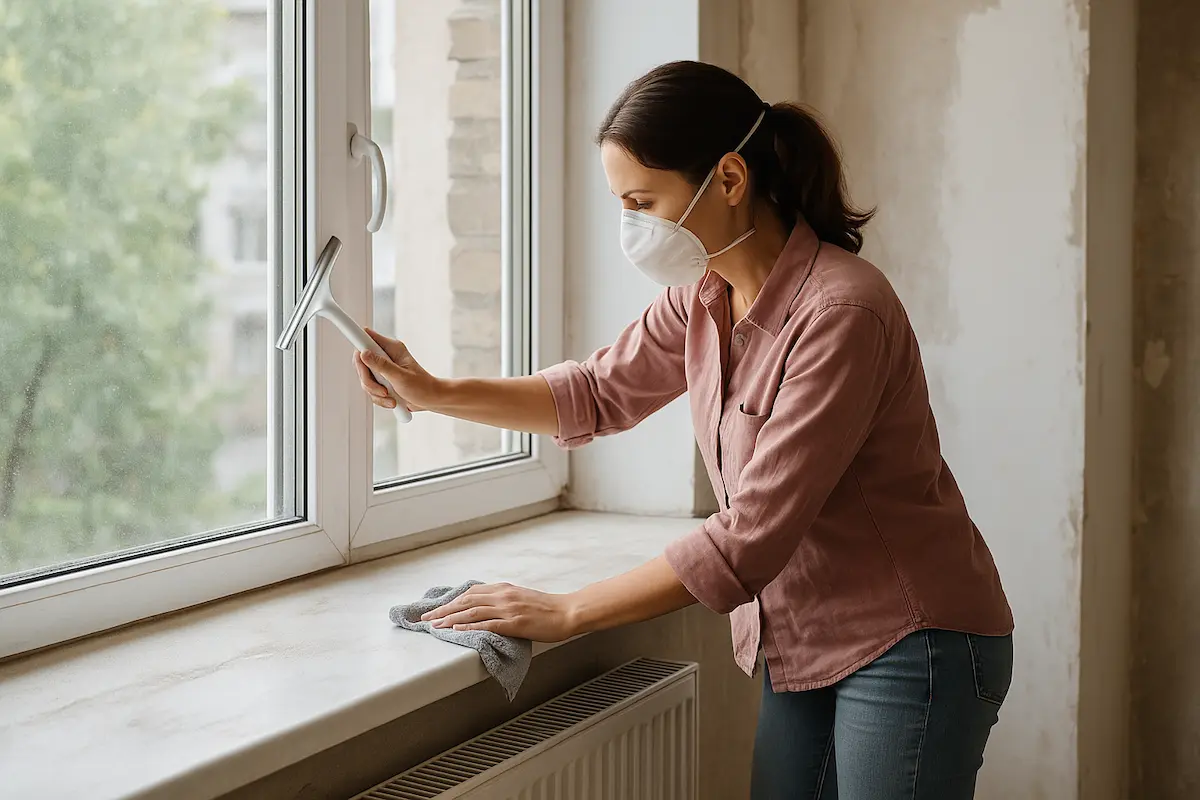
Step 4: Clean Windows and Glass Surfaces

Best Method to Remove Dust Film on Windows
Spray a 50/50 mix of water and vinegar, then wipe with a squeegee.
Recommended Glass Cleaners and Homemade Alternatives
If vinegar isn’t your thing, mild dish soap and water work wonders too.
Cleaning Window Tracks and Frames
Use a small brush or cotton swab to get into tight spaces.
Caption: A homeowner cleaning fine dust from window glass and frames to restore brightness and air quality after renovation.
Step 5: Deep Clean Floors Properly
Cleaning Different Floor Types (Tiles, Wood, Vinyl)
Each surface needs a unique approach—avoid harsh chemicals on wood or laminate.
Mopping Techniques That Trap Fine Dust
Use a two-bucket method: one for rinsing, one for clean water.
Avoiding Streaks and Residue After Mopping
Dry the floor immediately with a clean towel or dry mop.
Step 6: Air Vents, Fans, and Air Conditioners
Why Cleaning Air Vents Is Crucial After Renovation
Dust builds up inside ducts and can blow back into rooms once the AC is on.
How to Clean Air Filters and Fans Safely
Remove and rinse filters with mild soap. Let them dry completely before reinstalling.
When to Call a Professional for HVAC Cleaning
If there’s visible buildup inside the ducts or a lingering smell, get a specialist to handle it.
Step 7: Don’t Forget Hidden Areas
Places People Commonly Miss During Cleanup
Behind appliances, inside closets, under rugs, and light fixtures.
How to Check for Settled Dust in Corners and Behind Furniture
Use a flashlight to inspect dark corners—it’s amazing how much dust hides there.
Step 8: Purify the Air After Cleaning
The Role of Air Purifiers in Post-Reno Cleanup
Air purifiers with HEPA filters remove remaining airborne dust.
Natural Air Cleaning Solutions (Plants, Ventilation)
Plants like snake plants and peace lilies naturally filter indoor air.
Step 9: Dispose of Waste Responsibly
Sorting Recyclable vs Non-Recyclable Materials
Separate materials like wood, metal, and plastic for recycling.
Legal Disposal Methods in Malaysia
Avoid dumping renovation waste at regular landfills; use licensed disposal sites.
Why Proper Waste Disposal Prevents Fines
Illegal dumping can lead to heavy fines under local council laws.
Step 10: Maintain a Dust-Free Home
Regular Cleaning Habits to Prevent Dust Buildup
Vacuum weekly, mop twice a week, and keep windows closed on dusty days.
How Often to Replace Filters and Vacuum Bags
Replace every 2–3 months to maintain efficiency.
Professional Cleaning vs DIY
When It’s Worth Hiring Post-Renovation Cleaners
If the renovation was large-scale or involves multiple rooms, hiring pros saves time.
Cost Comparison Between DIY and Professional Cleaning
DIY may cost less upfront, but pros bring efficiency and deep-cleaning tools that last longer.
Conclusion
Cleaning after renovation isn’t glamorous—but it’s the final step to turning your house into a comfortable, livable home again. With patience, the right tools, and proper techniques, you can get rid of every trace of dust and enjoy your freshly upgraded space without worry.
FAQs
It depends on the project size—typically 1–3 days for an average home.
No, use a HEPA vacuum to prevent dust from escaping back into the air.
A mix of warm water and mild detergent works best. Avoid strong chemicals.
Always clean before moving furniture to avoid trapping dust underneath.
Seal off non-renovated areas with plastic sheets and use air filters during construction.